
Showing posts with label New Beginnings. Show all posts

Saturday, November 16, 2013

Tina Teasdale Creates a Greeting Card using New Beginnings Printable Journal Papers


 I have used this paper for this card as it is just so versatile and is up there on my favourites list. I took a card blank and using tacky glue around the edges attached the paper to wich I lightly inked around the edges with a dark pink ink by Papermania.

 I then cut out the envelope glued the edges and added a little lace and under the bottom lace a section from a green paper doily. ...I have also added a sentiment from the range to the top of the envelope. To Embellish I added a cream rose , pink feathers and a hatpin in the bottom right corner. The bow is made from lilac 10 mm organza ribbon. I have purposely kept the card quite simple so as to show the paper in its best ( in my opinion) light. 

 These papers and elements really are stunning and to date are high up on my favourite TR list! They are a must for any crafter and can be used for a whole multitude of purposes!


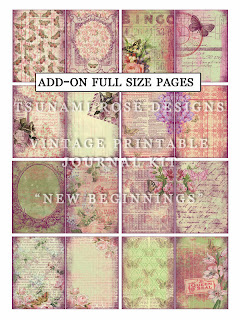


http://www.zibbet.com/tsunamirose/artwork?artworkId=1790671http://www.zibbet.com/tsunamirose/artwork?artworkId=1790671

Tsunami Rose Designs Links

Thursday, November 14, 2013

New Beginnings Printable Journal Greeting Card by Marleen Gallagher


For my project using the "New Beginnings" journal kit, I decided to make an A4 card. Its not a space I usually make as I find the bigger size hard to fill. But Im a very keen scrapbooker and mainly scrap in the format 12x12. So for this card I decided to combine the 2. I thought like a scrapper only making a card.

 My scrapbooking style is often very clustered and that is what i transfeered to this card. I simply cut out the elements from the printed sheets and layered them up. All I added to the kit, was the extra butterflies and the ribbon down the side.


http://www.zibbet.com/tsunamirose/artwork?artworkId=1790671http://www.zibbet.com/tsunamirose/artwork?artworkId=1790671

Tsunami Rose Designs Links

Tuesday, November 12, 2013

Greeting Card Tutorial by Linda ~ using New Beginnings Printable Paper

Take 2 pieces of cardstock in the size 6x12"
Score both at 6" and fold


Put adhesive on one side of 1 of the pieces


Cut on the other side of the cardstock, from corner to corner


This is how it should look now


Cut from corner to corner of the second paper - Then you should end up with 2 pieces like this


Put the 2 pieces together so it looks like this
 
 
Now its time for some patterned paper.

Take 1 piece 5½x5½" that you cut into 2 triangle shaped pieces, and 1 piece thats 5x5" that you add to a piece of cardstock thats 5 3/4x5½"


Put some adhesive on the right flip and fold it in


Add some patterned paper - Then repeat the last step and close the left flip
 
 
Add some more patterned paper


Put the square pieced patterned paper on the cardstock piece and...


...put it in the pocket.

Now to the really fun part...DECORATE


Done.

Hope you liked my tutorial, I sure enjoyed making it 


http://www.zibbet.com/tsunamirose/artwork?artworkId=1790671http://www.zibbet.com/tsunamirose/artwork?artworkId=1790671

Tsunami Rose Designs Links

Monday, November 11, 2013

Moria Gray creates a beautiful "Tag Wallet" using New Beginnings Printable papers

I made what I am calling my "Tag Wallet" using the New Beginnings papers from Tsunami Rose Designs.

 These papers are so beautiful, I love the colours and the design.  There is a beautiful vintage feel to them, and they can be used for so many different projects.

 This is how I made it>>>>>>


These are the papers I selected from the pack plus 2 sheets of coloured A4 card, plus my punches and embossing folder.


I scored one of the sheets of card to make thebasic wallet shape, and embossed and cut the other sheet, then cut out all the tags and sentiments I would need from the New Beginnings paper pack.


Here I have stuck down the embossed card to the wallet and folded up one side to make the pocket, I have also cut the paper and inked it. I also inked round the wallet.


Starting to take shape now! You can see the pocket for the tags.


I had some gorgeous lace with ribbon threaded thru it, so I used this as a trim.
I also used some embellishments for the front, you can see them on the finished wallet.
You can see I have stuck down one tag and some sentiments.


This is all the tags I used from the New Beginnings pack, I have inked round the edges and used some fibres for ties. I also took two small cards and punched and inked them, then used a couple of sentiments on the front just for a different idea.


And the finished wallet with tags.  I really enjoyed making this, and using the most gorgeous New Beginnings paper pack.  Why not give them a try and see what you can create.


http://www.zibbet.com/tsunamirose/artwork?artworkId=1790671http://www.zibbet.com/tsunamirose/artwork?artworkId=1790671

Tsunami Rose Designs Links