

Start with a 12x12" cardstock that you score at 3" and 9".
Then turn and score on 3" and 9" again.
Cut and take the "corners" away. (the ones marked with an X)
Then turn and score on 3" and 9" again.
Cut and take the "corners" away. (the ones marked with an X)

This is how it should look when you have taken the corner parts off.

Fold on the scored lines.

Now its time for some patterned paper.
I have used;
2 pieces in the size 4½ x 4½"...
2 pieces in the size 2½ x 5½"
(also 2 more pieces in the same size that you will see on another picture)
4 pieces in 4½" x 2½"
I have used;
2 pieces in the size 4½ x 4½"...
2 pieces in the size 2½ x 5½"
(also 2 more pieces in the same size that you will see on another picture)
4 pieces in 4½" x 2½"

As a mat for the patterned paper I have used
2 pieces in the size 5 3/4" x 5 3/4"
8 pieces in the size 2 3/4" x 5 3/4"

Now you can assemble the inside of the card, I chose to chalk the edges first.

Before assembling the back and the "front doors" of the card I choose to add an orange ribbon, to be able to close the card later on.

Here you can see how it will look when the ribbon is on place.
After this step you can assemble the backing paper and the papers on the "doors". ( The papers I used on the doors is shown on a later picture)

Next step is to decorate with papers/decorations of your choice.
I have added some stickles and rhinestones to make the papers pop out even more.

I added some 3D foam pads to make the banner pop up more

Here you can see the papers I used on the doors. I added a lot of Stickles here too....you can never have too much bling .
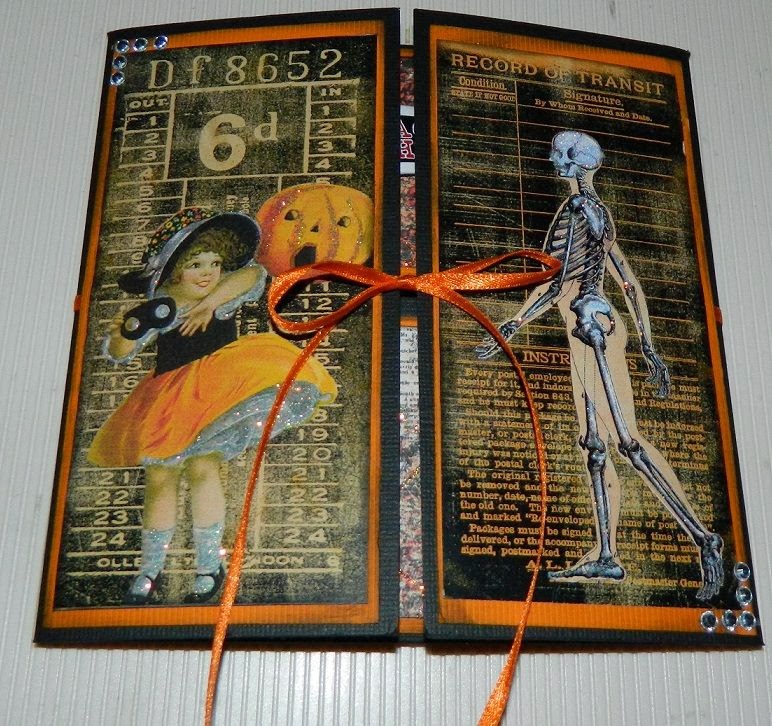
A close-up where you can see that I even blinged some details on the pumpkin.

The back of the card. I added stickles on the "net" pattern, and that I have done on all the patterned papers.

 |
| Click Image to visit "Witches Brew" in Zibbet Shop |
 |
| (Click Image to See Journal in Zibbet Shop) (To see in Etsy Shop click here) |


Tsunami Rose Designs Links
No comments:
Post a Comment