Showing posts with label Tutorial. Show all posts

Saturday, December 3, 2016

Youtube tutorial DIY journal charms by TsunamiRose


Hi everyone Daisy here! I have been trying to be more active on my Youtube channel recently. I am striving to post 2-3 videos each week, so please make sure to subscribe to my channel so you don't miss any! 

In this video I have made some lovely journal charms that I think are super cute! They are easy to make with just simple tools. Thank you for watching in advance! 


TRD Etsy shop: http://bit.ly/tsunamirose 
TRD FB Fan Page: http://bit.ly/trdfbfanpage 
TRD FB Group: http://bit.ly/trdfbgroup 
TRD Blog: http://bit.ly/tsunamiroseblog

Tuesday, November 5, 2013

Trudy Harris Thomas creates a beautiful box using Life Abloom Printable Journal


I've used the Lifes Abloom Full Size Journal Papers for this rose box this week. I have a good friend getting married in a few weeks and I am doing her wedding flowers for her and thought this would be perfect for rose petals as I'm cleaning them for the bouquets. It's such a beautiful paper and is perfect for wedding use.


I began by gathering together my papers and some embellishments that I knew would match the pink and ivory color scheme my friend was using. The colors of the paper made it so easy for me to decide what to make for my DT project.


I cut the tops and bottoms of the 12 x 12 cardstock according to the directions I found on www.marthastewart.com/266500/valentines-day-boxes, using a friskars scalloped border punch, I added the decorative trim to the outside bottom of the top of the box.


The punched edges were distressed with Tim Holtz Distress stain (spun sugar)


I used a Spellbinders wavy rectangles die to cut out the center of Daisy's beautiful journal paper.


I hand cut a square out of the white cardstock (top) and attached a piece of celophane with my ATG. The designer paper was distressed with Tim Holtz Vintage Photo Ink and taped to the box top.


The four sides were cut, distressed and attached to the side of the box top


Bisque Liquid Pearls was added all the way around the outside of the bottom of the box and allowed to dry. The pink ribbon was attached with double sided tape


More satin ribbon was added to the box bottom


To give it a more finished look


The pearl trimmed lace was attached with double sided tape just to the edge of the pink satin.


Although difficult to see - 3 strands of pearls was glued to the bottom left corner.


I die cut some leaves with my Cricut and stained them with Pimento Memento Ink and added some shading with Spectrum Noir markers


The leaves were attached to the box with glue dots


Roses were cut from the Spiral Blossoms (Spellbinders) die, distressed with red ink and rolled into flowers.


I made the bow from ivory satin ribbon in the same width as the pink ribbon, attached it to the box with double sided tape, added the pearl bling center (Michael's bridal Dept) and then placed the rose buds on the box and attached them with Tacky glue, adding a pearl bead to the center of each flower.


http://www.zibbet.com/tsunamirose/artwork?artworkId=1790661http://www.zibbet.com/tsunamirose/artwork?artworkId=1790661


Tsunami Rose Designs Links

Saturday, August 31, 2013

How to Edit Color on Digital Sentiments & Stamps with Google's Picasa


Hello everyone! Daisy here with a tutorial that I know will help all of those who love digi sentiments and digi stamps! I have a new youtube video on how to edit digi sentiments and digi stamps to fit the colors of any of your projects!

I am showing you this using the free program PICASA, it is from Google so you know it is safe. Download it only from its official website picasa.google.com 

Thank you so much for your continued support, and keep a look out for new things at the Tsunami Rose Zibbet Shop!


Tsunami Rose Designs Links

Wednesday, November 28, 2012

Tutorial: Show us how to make an Altered Gift Bag using "Vintage Corset Paper"

 
One of the wonderful aspects of being a part of the Tsunami Rose Designs team are the
sneak peeks we get from all of Daisy’s marvelous designs. Beginning on November 1st,
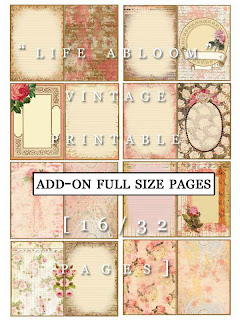
Tsunami Rose Designs will begin selling the first ever, Life Abloom Printable Journal.
This is one stunning design you will not want to miss. When you purchase a printable
from the Tsunami Rose Designs Shop, you are purchasing a high quality digital image,
that is printable on any type of printer. What is really superb, once you purchase the
design, you can use it as many times as you desire. I promise, the Life Abloom is one
design you will not want to miss. You will find the new Life Abloom Printable Journal Kit
at www.zibbet.com/tsunamirose. To add to the fun, the first 20 people to purchase the
journal will get an additional free $5.00 to spend in the Tsunami Rose Designs Shop!

********

My name is Steph D. and I am from Hawaii. I have loved the arts and
crafting all my life. I started blogging in 2009 and have enjoyed meeting
wonderful talented friends from all over the world. I also love sharing my
projects and seeing all the gorgeous creations by others. I am honored to be a
part of the Tsunami Rose Design Team.

I completed this project as part of the challenge to alter a
gift bag using "Vintage Corset" Paper.
Here is a little tutorial on
how I created my gift bag:
1. Obtain a plain paper gift bag.
2. Use the beautiful Vintage Corset and Vintage Music Sheet
Digital Printables in Pink and Purple from Tsunami Rose Designs.
3. Cut the papers down to size.
4. Ink up the edges of the papers with Distress Ink in tumbled glass.
5. Create a band with layered cardstock, paper, and trim.
6. Adhere the paper and band down.
7. Add some pearl trim to the band.
8. Embellish with crystal heart spray and paper flowers.


9. Finished altered gift bag.

I do hope this project inspires you to create something today.
Be sure to check out the TRD on Facebook and, Daisy's Zibbet Store
Tsunami Rose Designs You will not be diappointed!

Have a great and be sure to come visit me
Big warm hugs to you all!
Please make sure you stop by and visit each of my Design Team!!
Full Time Card Designers (All 30 days of November)
Linda (Ultima)
Part Time Card Designers (no less than 4 sketches a week)
Monthly Projects
YouTube
Check out our Giveaway too!!!


You can now find us in our
new etsy store @
http://www.etsy.com/shop/TsunamiRose

Friday, November 9, 2012

Altered Clip Board ~ Design Team Member ~ Jearise Havenga

One of the wonderful aspects of being a part of the Tsunami Rose Designs team are the sneak peeks we get from all of Daisy’s marvelous designs. Beginning on November 1st, Tsunami Rose Designs will begin selling the first ever, Life Abloom Printable Journal. This is one stunning design you will not want to miss. When you purchase a printable from the Tsunami Rose Designs Shop, you are purchasing a high quality digital image, that is printable on any type of printer. What is really superb, once you purchase the design, you can use it as many times as you desire. I promise, the Life Abloom is one design you will not want to miss. You will find the new printable journal here . To add to the fun, the first 20 people to purchase the journal will get an additional free $5.00 to spend in the Tsunami Rose Designs Shop.

There are several pages we would love for you to follow, two on Facebook, the wonderful Facebook TRD Group! and the New TRD Facebook Page, the third page is the Tsunami Rose Designs by Daisy Collins blog page. Following the blog will provide you with daily inspiration on how to use the wonderful printables from the shop.

My inspiration for you today:

Lorby's World DT Project for Tsunami Rose

I love doing crafts as long as I can bring paper into it and this project was perfect for that. I altered a clipboard using the beautiful papers from Tsunami Rose.


Papers Used: grunge wood plank digital paper for the background. cut out the fairies from the 3x3 Printable Ephemera "fairies" Life Abloom Tabs Ad On from the Life Abloom journal.

This project will make the perfect birthday present for my daughter who turns 8 in less then a month and it's such a fun and easy project. I had a fun time doing it!

Please make sure you stop by and visit each of my Design Team Sisters.

Full Time Card Designers (All 30 days of November)
  1. Lynne   
  2. Linda (Ultima)
 Part Time Card Designers (no less than 4 sketches a week)
  1. Susan Patten
  2. Veronica Meras
  3. Marla Howell
  4. JoJo

Monthly Projects
  1. Lynne   
  2. Adelle
  3. Steph
  4. Jearise
  5. Susan
  6. Cheryl
  7. Violet
 YouTube
  1. McCine
  2. Veronica


Friday, November 2, 2012

How to Create An Altered Trinket Box using "Life Abloom" Paper by Steph D.


One of the wonderful aspects of being a part of the Tsunami Rose Designs team are the sneak peeks we get from all of Daisy’s marvelous designs. Beginning on November 1st, Tsunami Rose Designs will begin selling the first ever, Life Abloom Printable Journal. This is one stunning design you will not want to miss. When you purchase a printable from the Tsunami Rose Designs Shop, you are purchasing a high quality digital image, that is printable on any type of printer. What is really superb, once you purchase the design, you can use it as many times as you desire. I promise, the Life Abloom is one design you will not want to miss. You will find the new printable journal here . To add to the fun, the first 20 people to purchase the journal will get an additional free $5.00 to spend in the Tsunami Rose Designs Shop.

There are several pages we would love for you to follow, two on Facebook, the wonderful Facebook TRD Group! and the New TRD Facebook Page, the third page is the Tsunami Rose Designs by Daisy Collins blog page. Following the blog will provide you with daily inspiration on how to use the wonderful printables from the shop.

My inspiration for you today:


Tutorial: How to Create An Altered Trinket Box using "Life Abloom" Paper by Steph D.

My name is Steph D. and I am from Hawaii. I have loved the arts and crafting all my life. I started blogging in 2009 and have enjoyed meeting wonderful talented friends from all over the world. I also love sharing my projects and seeing all the gorgeous creations by others. I am honored to be a part of the Tsunami Rose Design Team.

Today I am showcasing for you a tutorial on how to create an Altered Trinket Box using "Life Abloom" Printable Journal Kit Papers. You can use any box, of any size, of any type.

Here is a little tutorial on how I created my trinket box:


Step#1: Get a box to alter :).
Step#2: Paint the box with gesso


Step#3: Add a layer of acrylic paint.


Step#4: Cut out paper to embellish your box. Ink up the edges with Distress Ink.


Step#5: Adhere the papers onto your box.


Step#6: Add Crackle Accents to the rose image to make it have dimension and texture.
Step#7: Embellish with Stickles, paper roses, acrylic flowers, flower pearl beads, heart half-back pearls, pearl trim, seam binding, lace, and rose cabochon. 


You can visit my blog at http://sweetcraf-teachick.blogspot.com/.

Please remember to visit my sister Design Team Blogs to see the wonderful creations they have created using printables from Tsunami Rose Designs.


Full Time Card Designers (All 30 days of November)

  1. Lynne   
  2. Linda (Ultima)
 Part Time Card Designers (no less than 4 sketches a week)

  1. Susan Patten
  2. Veronica Meras
  3. Marla Howell
Monthly Projects
  1. Lynne   
  2. Adelle
  3. Steph
  4. Jearise
  5. Susan
  6. Cheryl
  7. Violet
 YouTube
  1. McCine
  2. Veronica
Please feel free to "pin" our pictures to your pinterest boards!

I'd like to enter this to:

Crazy for Challenges: Anything but a card
Brown Sugar Challenges: Pearls and Lace
Fussy and Fancy Friday Challenges: Pearls and Flowers
Joyful Stamper: Anything goes
Polka Doodles: Bright colors and sparkle